Introduction to Farcaster Frames
![]() · 4 min
· 4 min
In this article I will share the process I have followed in order to configure a Farcaster frame on an existing SPA. Let’s go!
1. Download manifest on Warpcast
Farcaster require a publicly accessible manifest in order to be able to identify the owner of the frame.
This is a json file with two main sections :
- accountAssociation : this part contains the data which allow to associate the frame with a Farcaster account
- frame : this part contains the frame settings
The manifest can be generated from Developer Tools in Warpcast.
First we have to enable Developer Tools in Settings > Advanced > Developer mode
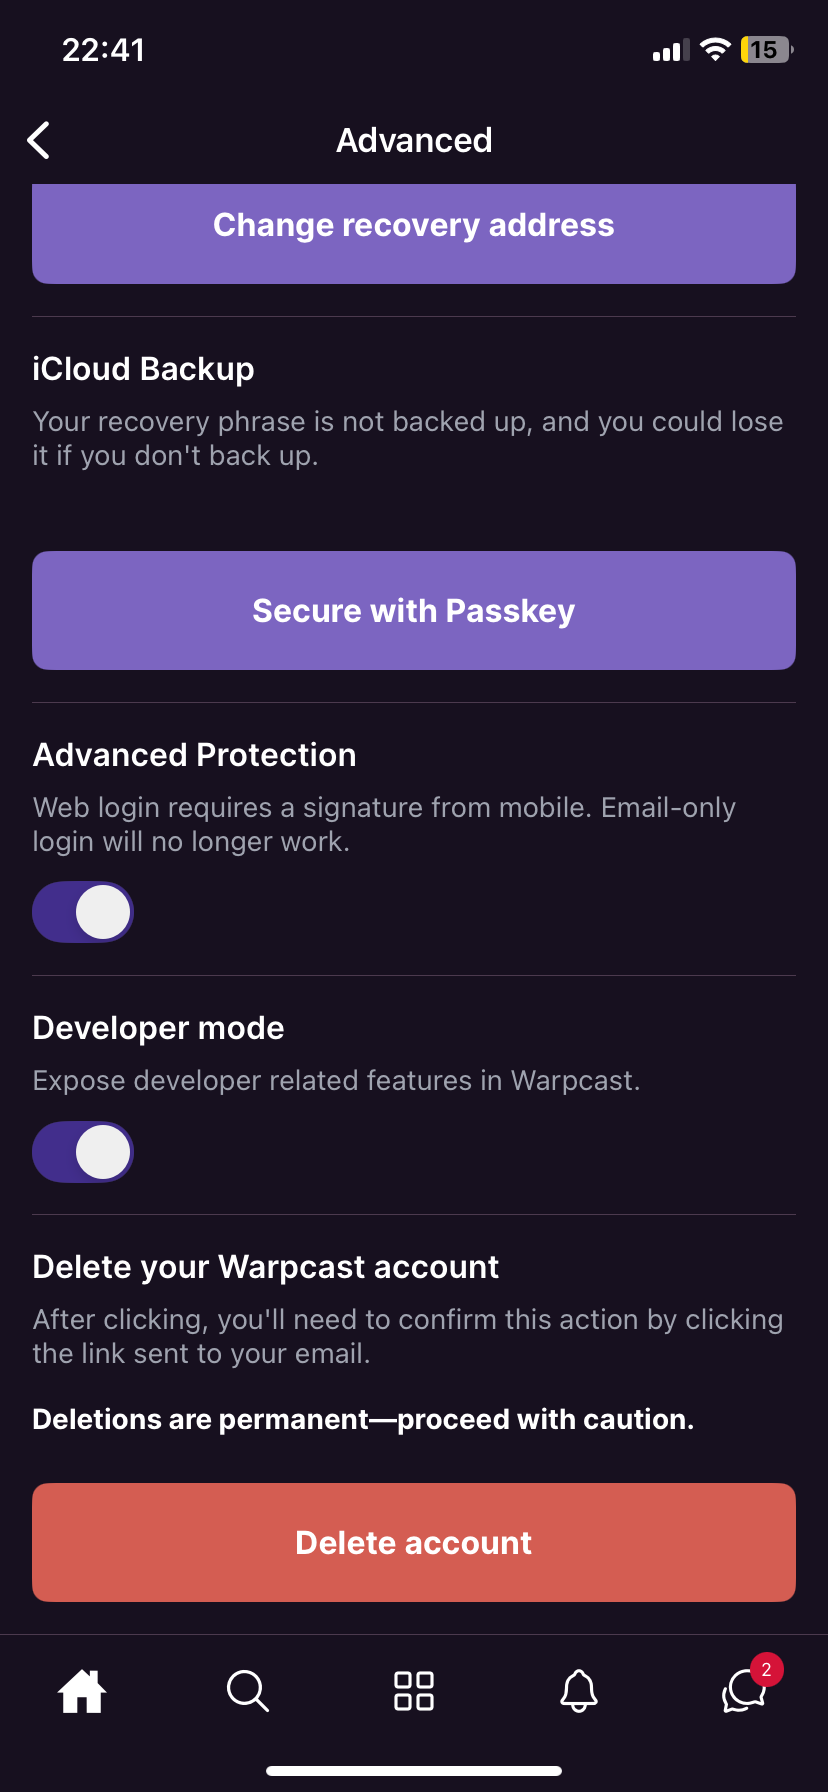 Enable Developer Tools
We can now access to the Domain Manifest section in Settings > Developer > Domains
Here we can add domain name without protocol (ex web3.anyvoid.xyz), and next we can click on Generate domain manifest. A json file is generated and copied into the clipboard, the next step is to update the frame section of the manifest.
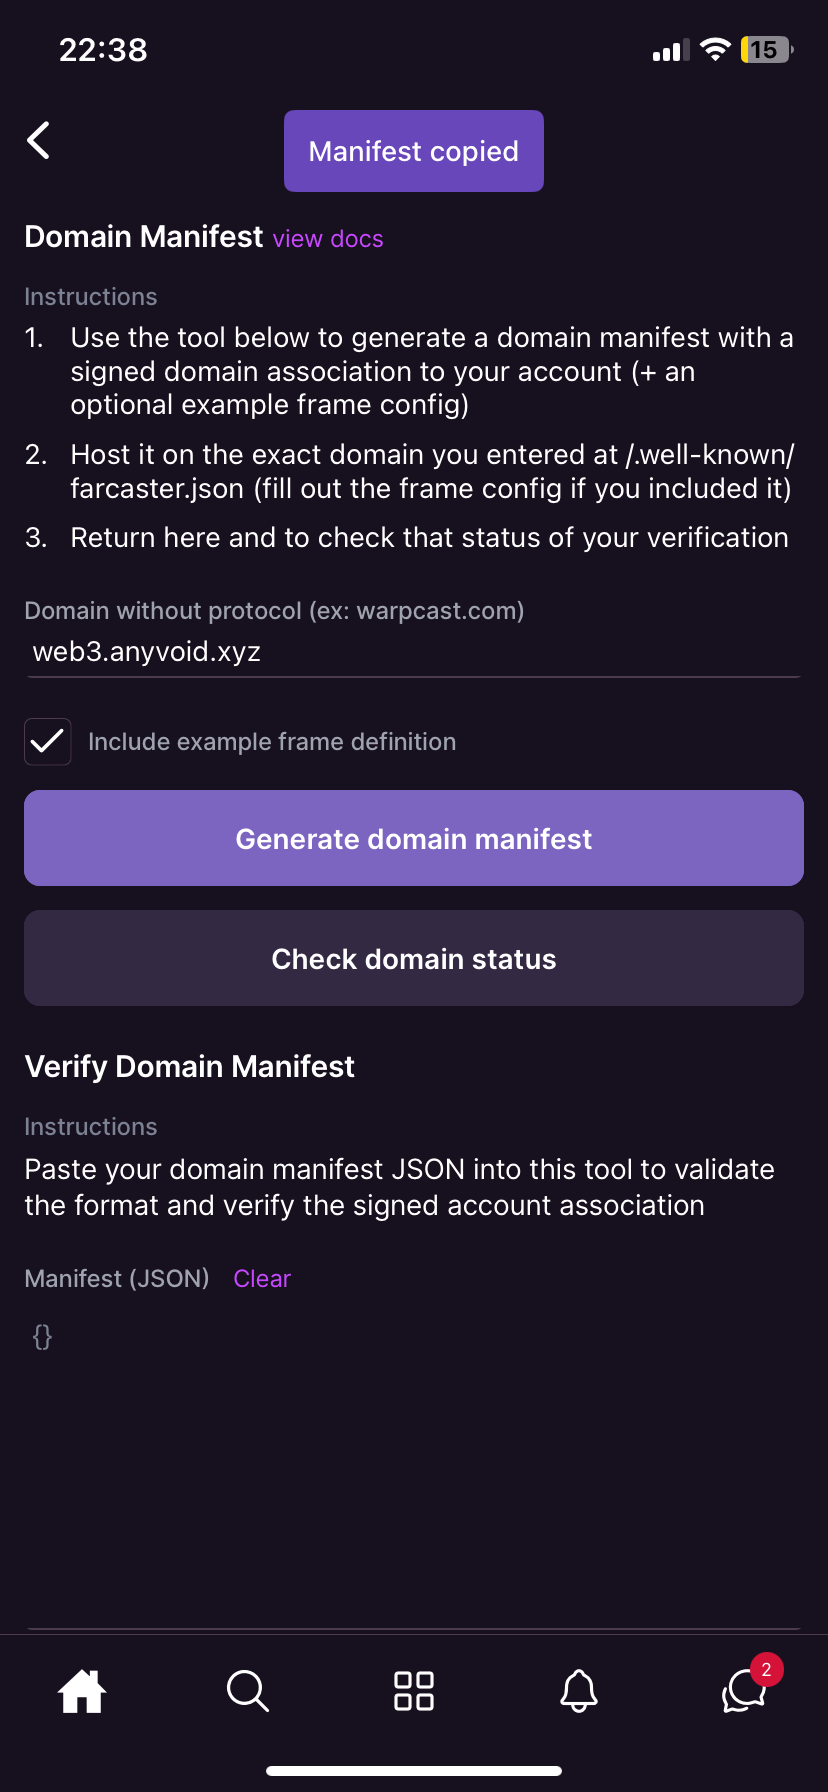 Generate Manifest
2. Update Manifest
In the json file we have to update attributes in the frame section :
- name
- iconUrl
- homeUrl
- imageUrl
- buttonTitle
- splashImageUrl
- splashBackgroundColor
Note: The webhook attribute has been removed because it was not relevant for this application.
The manifest must accessible from .well-known/farcaster.json in the public directory of the application. For this example, the manifest is available at this address : https://web3.anyvoid.xyz/.well-known/farcaster.json
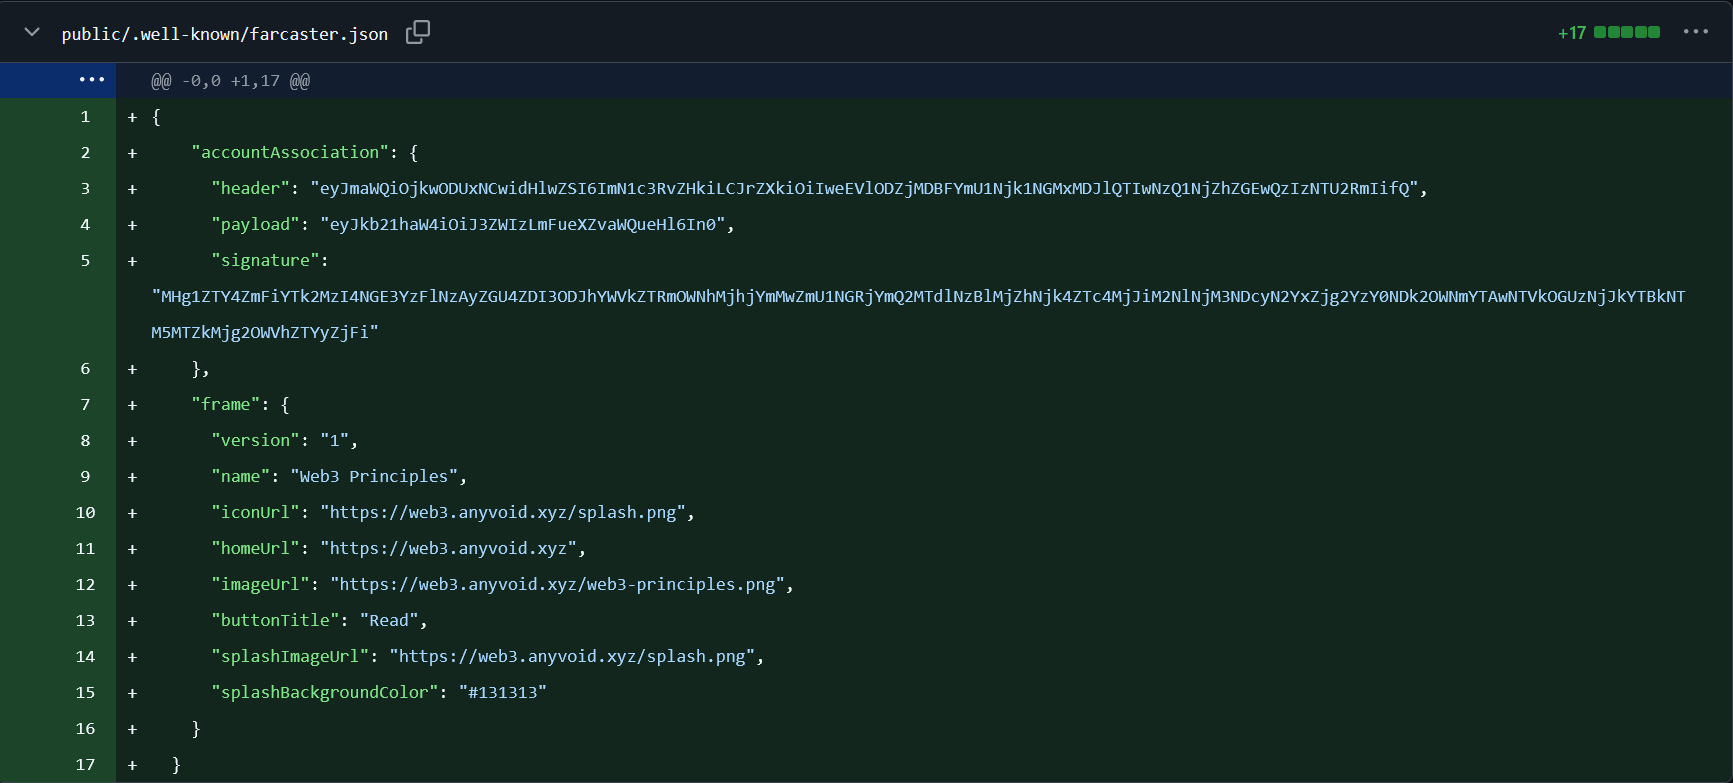 feat(farcaster): add domain manifest
As we can see we have to add 2 images in the public directory, in my case I have used the following images :
 web3-principles.png
 splash.png
3. Use Farcaster Frame SDK
Now we have to install farcaster/frame-sdk in the project, it can be done using npm install :
npm install @farcaster/frame-sdk
Next we have to use the sdk in order to allow our application to load into the frame, you can see bellow the updated index.js file :
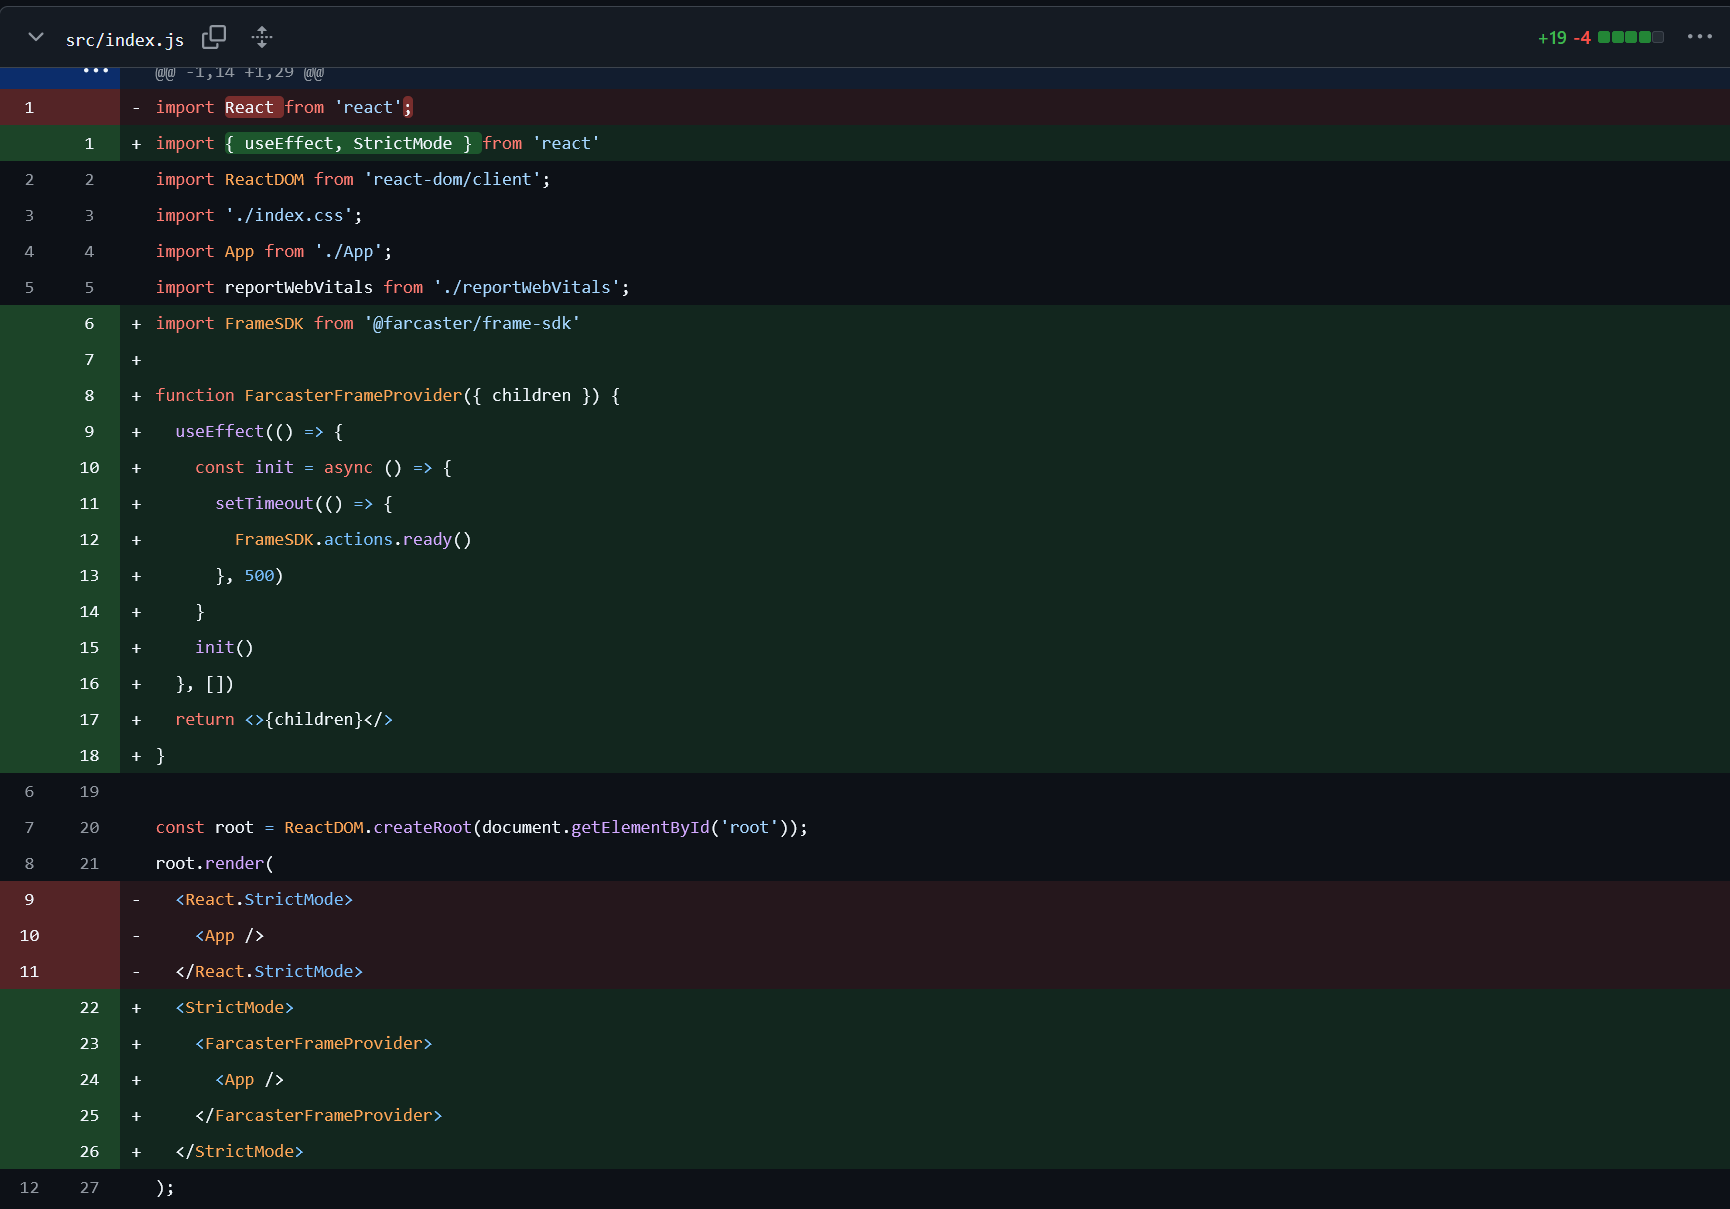 feat(farcaster): use frame sdk
4. Add Metadata
The last point is to add a new meta attribute in the page header in order to describe the frame. For this example, there is only one action, the goal is to open the application into the frame and be able to read it’s content.
The attribute has two properties :
- name :
fc:frame - content : json data
The result in my case is the following :
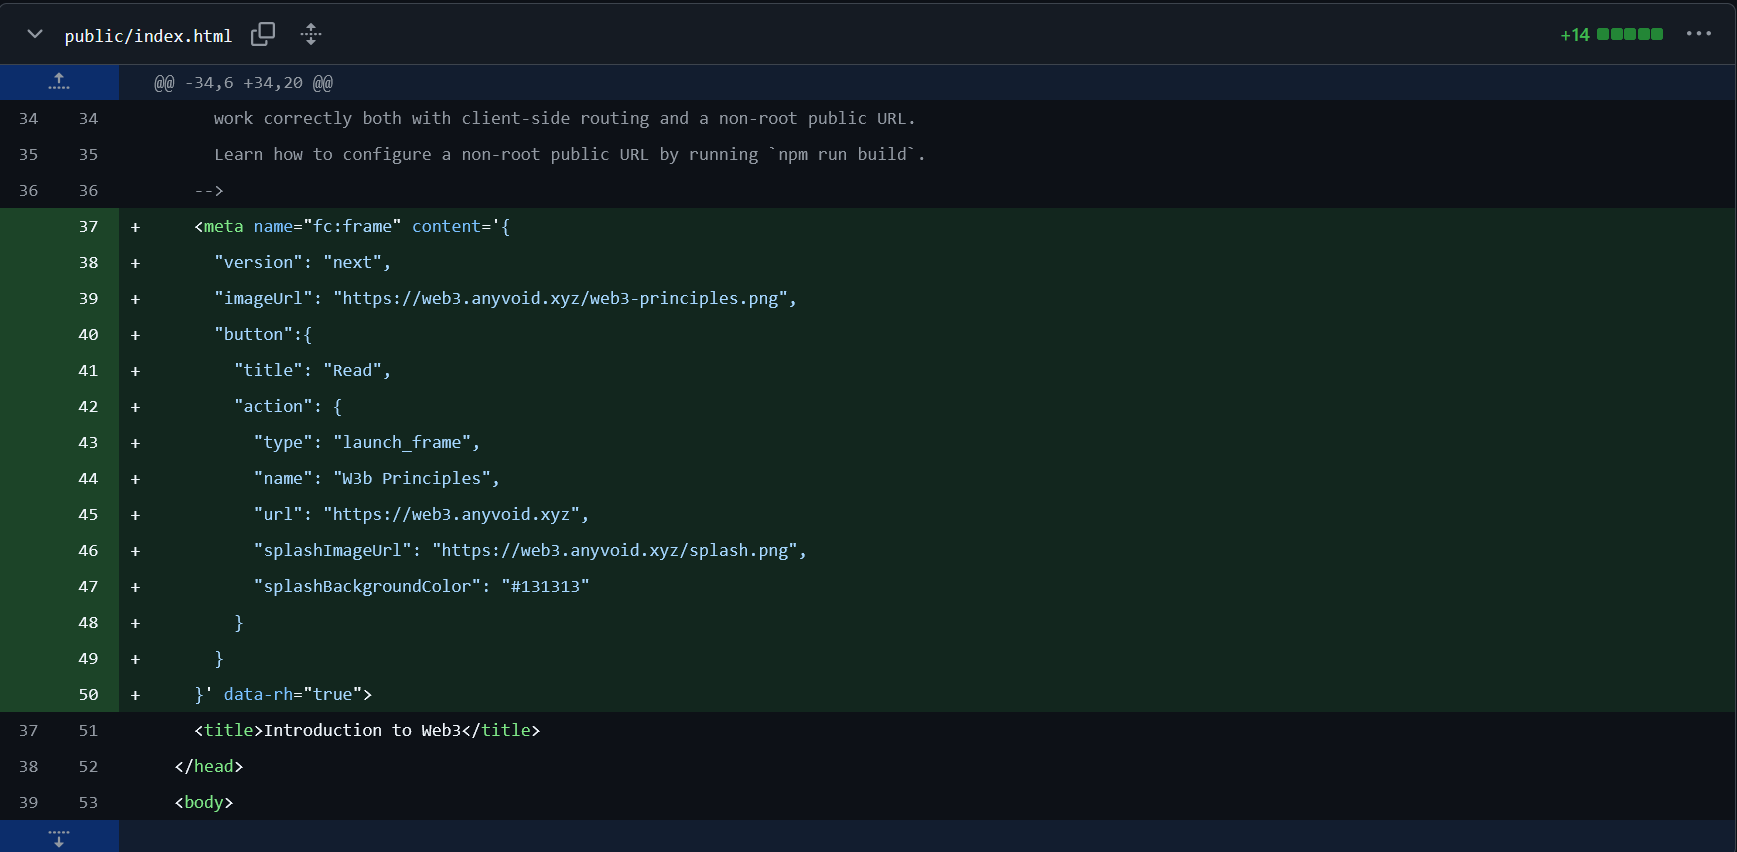 feat(farcaster): add embed tag
5. Validation
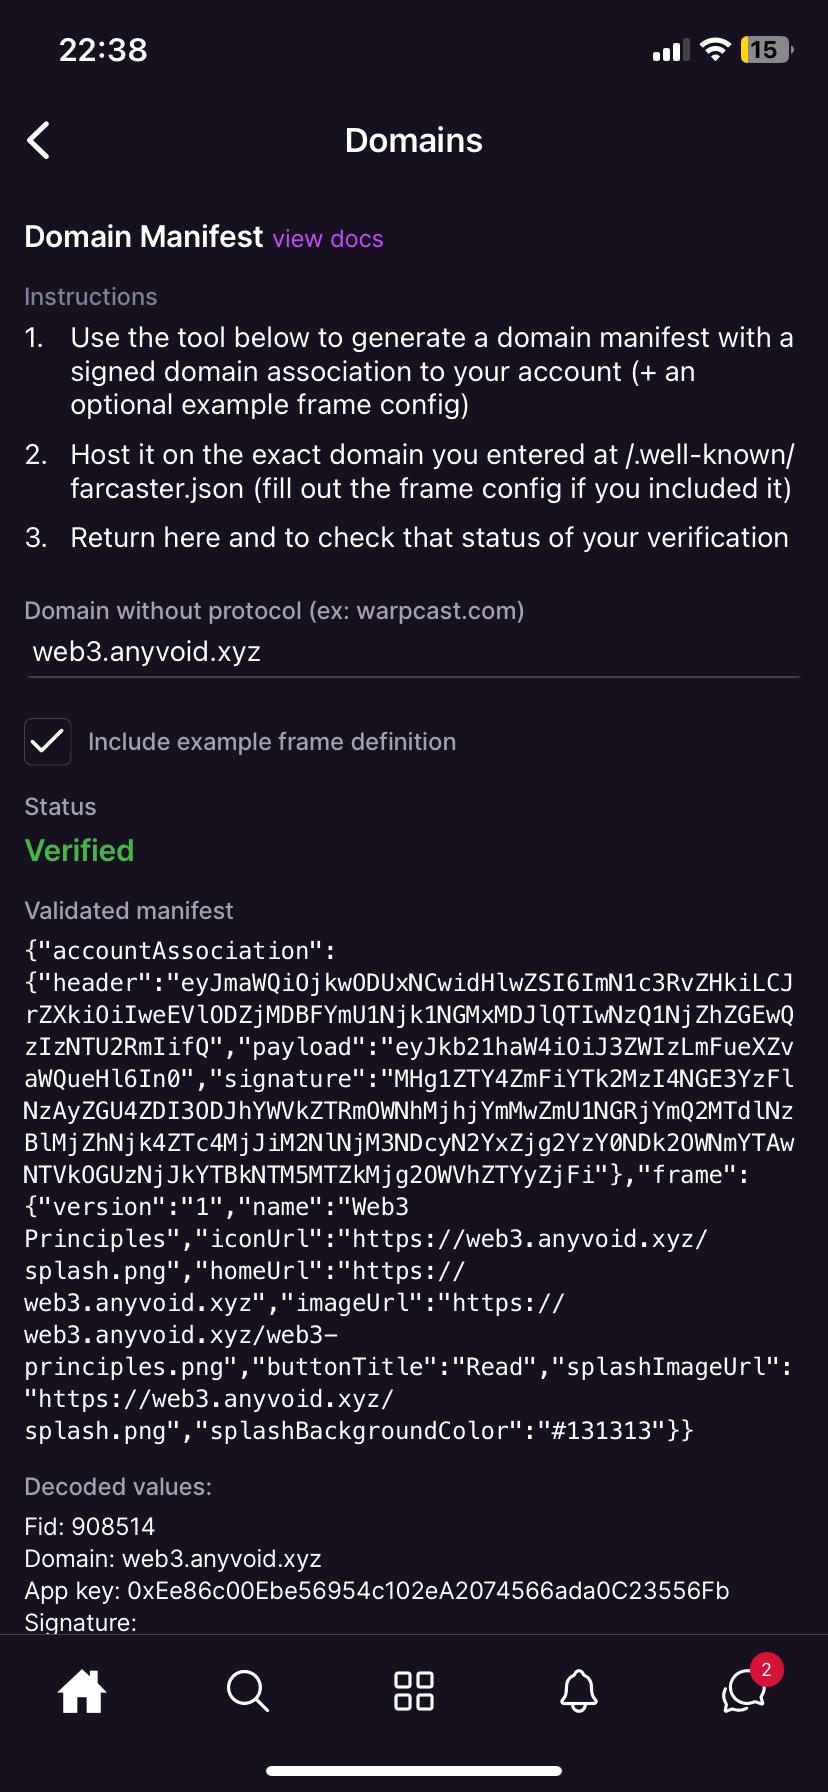
Deploy the application and go back on Warpcast in Settings > Developer > Domains and click on “Check domain status”
 Check domain status
Here we go! The status is verified, it means Farcaster has successfully parsed the manifest .well-known/farcaster.json
Now we can test the frame in Settings > Developer > Frames
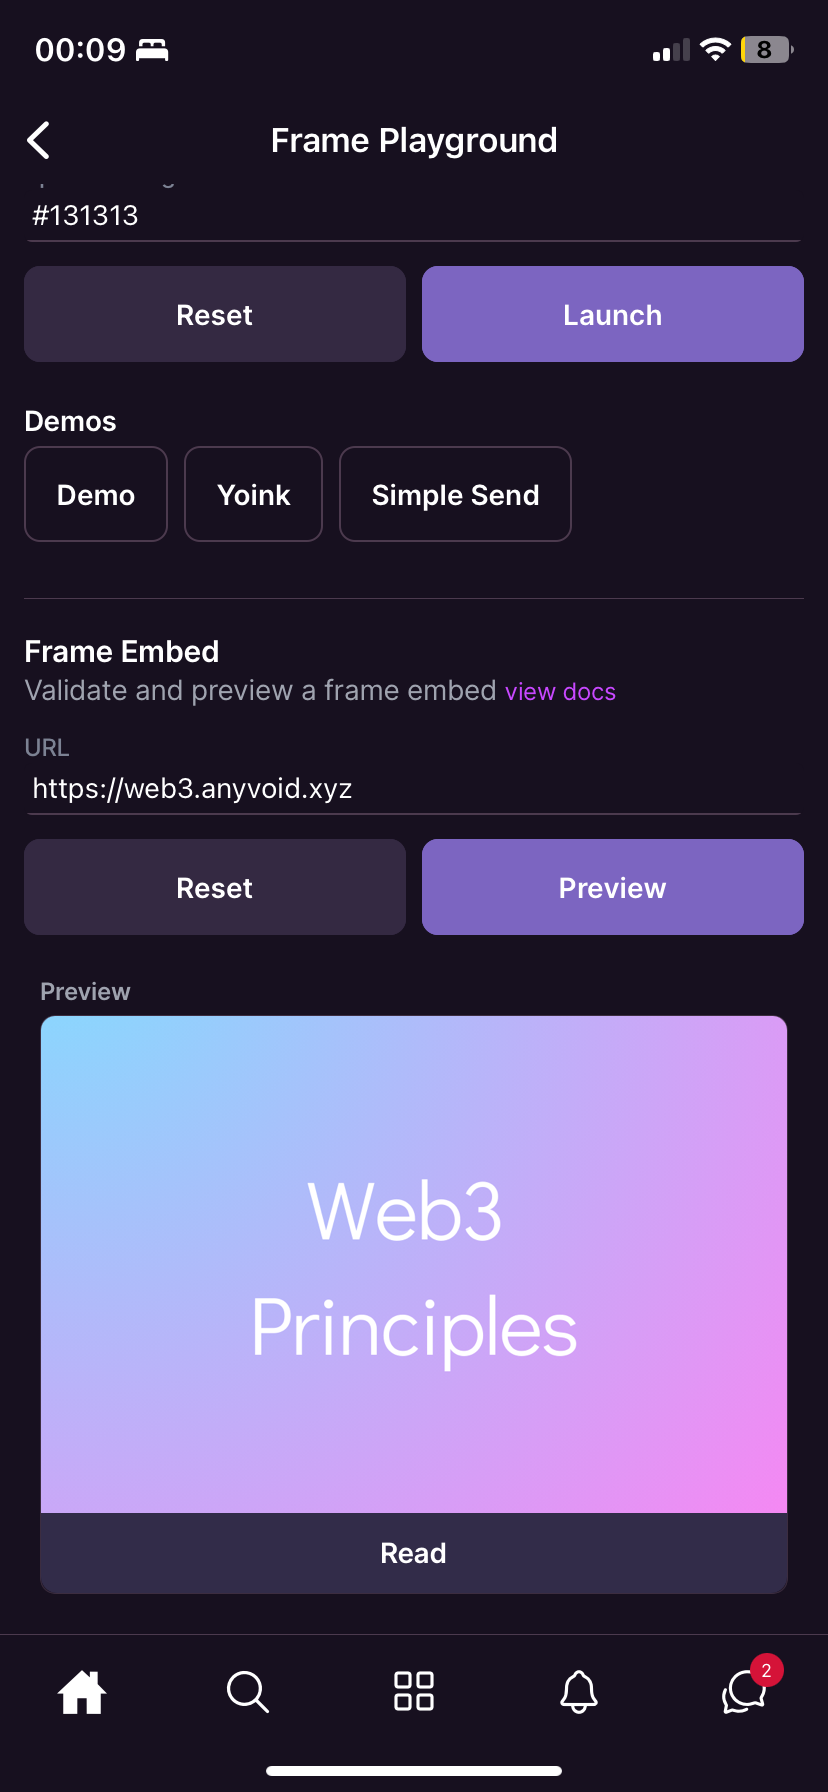 Frame Embed - Preview
Note: we can also test the frame using this url : https://warpcast.com/~/developers/frames
The frame is now ready to be used in Farcaster by sharing the link to the application into a cast.
Conclusion
In this article we’ve seen how to configure a Farcaster frame into an existing application in order to be able to read the content directly from the frame. As we can see it was pretty simple and the result is stunning.